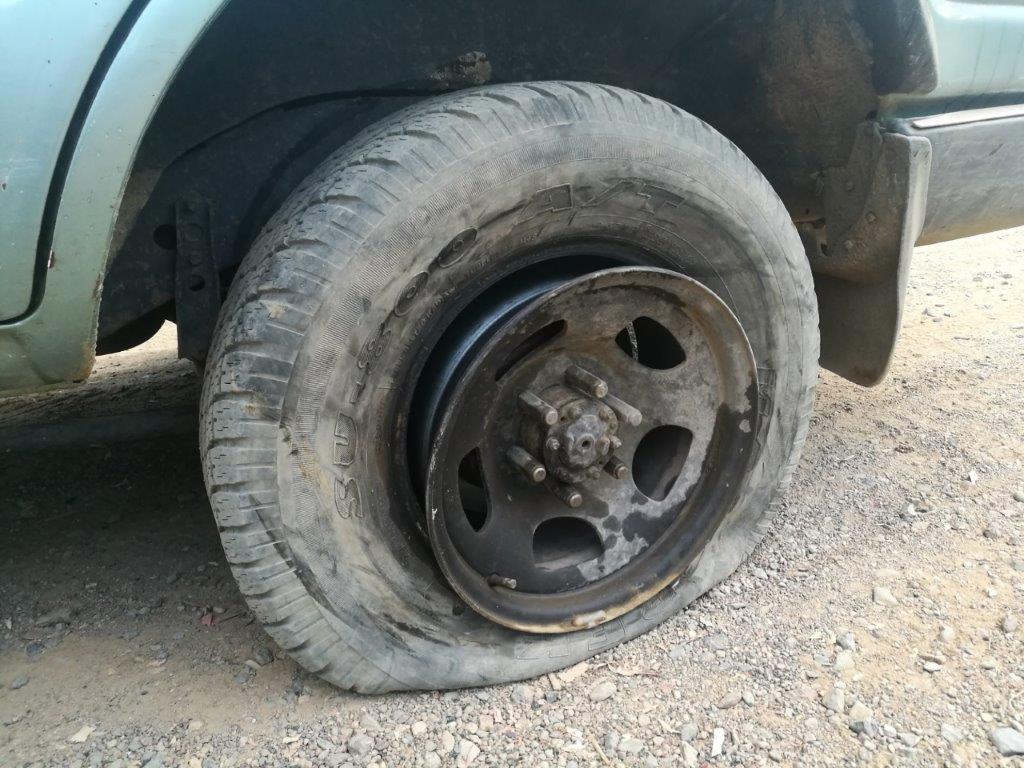
How to change a flat tyre – Changing a flat tyre in the bush is hot and frustrating for someone who knows what they’re doing, so if it’s your first time it’s a nightmare! You need to know the basics of how to do this before you leave, especially if you plan to go off road!
We’re bringing it back to basics and giving you a 5-step guide on how to do it!
How to Change a Flat Tyre – Step 1 – Bring The Equipment
How to Change a Flat Tyre – Step 1 – Bring The Equipment
“Changing a tyre is easy, I’ll just grab the jaaa….” Welcome to the first rule of changing a tyre, you need to have the equipment in your car to change a tyre!
Amazingly, there are backpackers our there buying and selling used vehicles “Road Trip Ready” without a suitable jack or tyre bar on board! This is not Europe, a missing jack in the bush could literally be the last mistake an ill-equipped traveller makes, so listen up!
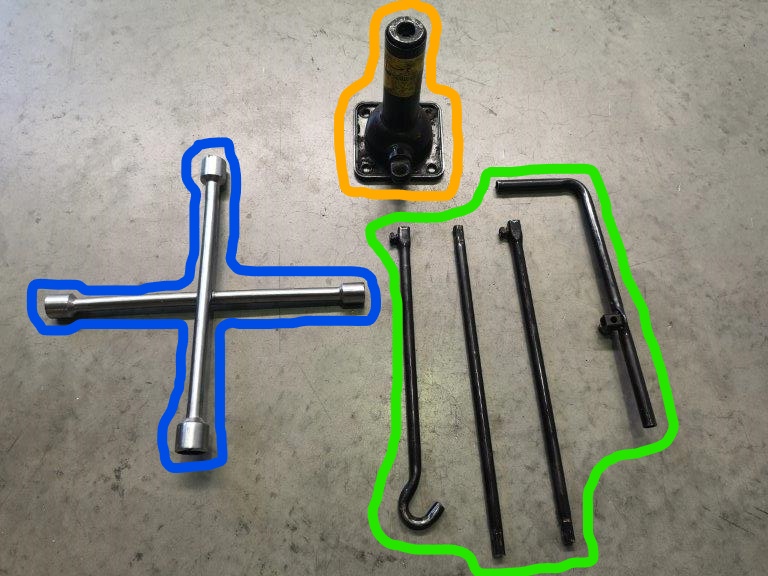
You will need:
- Tyre Bar (For the Wongai Landcruisers it is a 21mm fitting) (Blue)
- Bottle Jack or Jack (To Suit your vehicle) (Orange)
- Extension Bars (To suit your jack and vehicle) (Green)
How to Change a Flat Tyre – Step 2 – Chock the Wheels and Crack the Nuts
How to Change a Flat Tyre – Step 2 – Chock the Wheels and Crack the Nuts
Before you start, you will want to make sure the tyres you are not changing on the car are correctly chocked and the hand break is firmly on.
If you are on a hill, be particularly cautious and try to move the can onto a flat surface before starting the change.
Before you start, you will want to make sure the tyres you are not changing on the car are correctly chocked and the hand break is firmly on.
If you are on a hill, be particularly cautious and try to move the can onto a flat surface before starting the change.
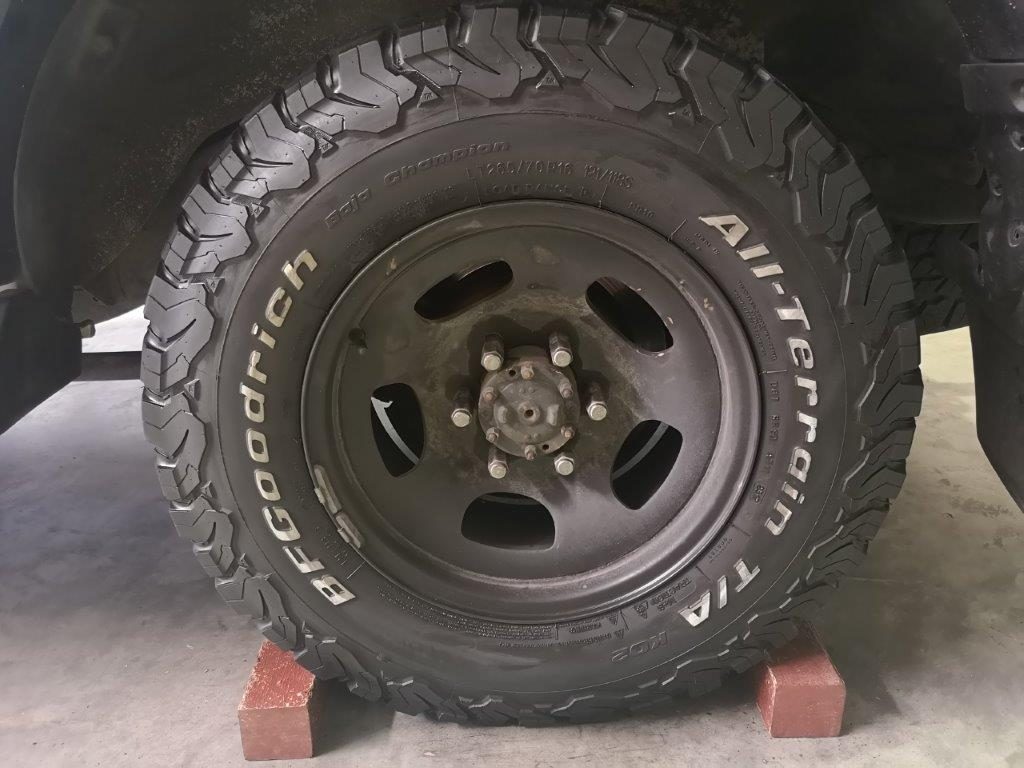
How to Change a Flat Tyre – Step 3 – Raise the Vehicle and Position Tyre
How to Change a Flat Tyre – Step 3 – Raise the Vehicle and Position Tyre
Ok, now you need to find the jack point on your vehicle. We have shown a suitable point circled below for a Landcruiser front passenger side wheel. If you’re not sure, ask a Wongai team member where it is on your car before you leave and we will be happy to help. Otherwise, check the owner’s manual for the make and model of your vehicle.
Ok, now you need to find the jack point on your vehicle. We have shown a suitable point circled below for a Landcruiser front passenger side wheel. If you’re not sure, ask a Wongai team member where it is on your car before you leave and we will be happy to help. Otherwise, check the owner’s manual for the make and model of your vehicle.
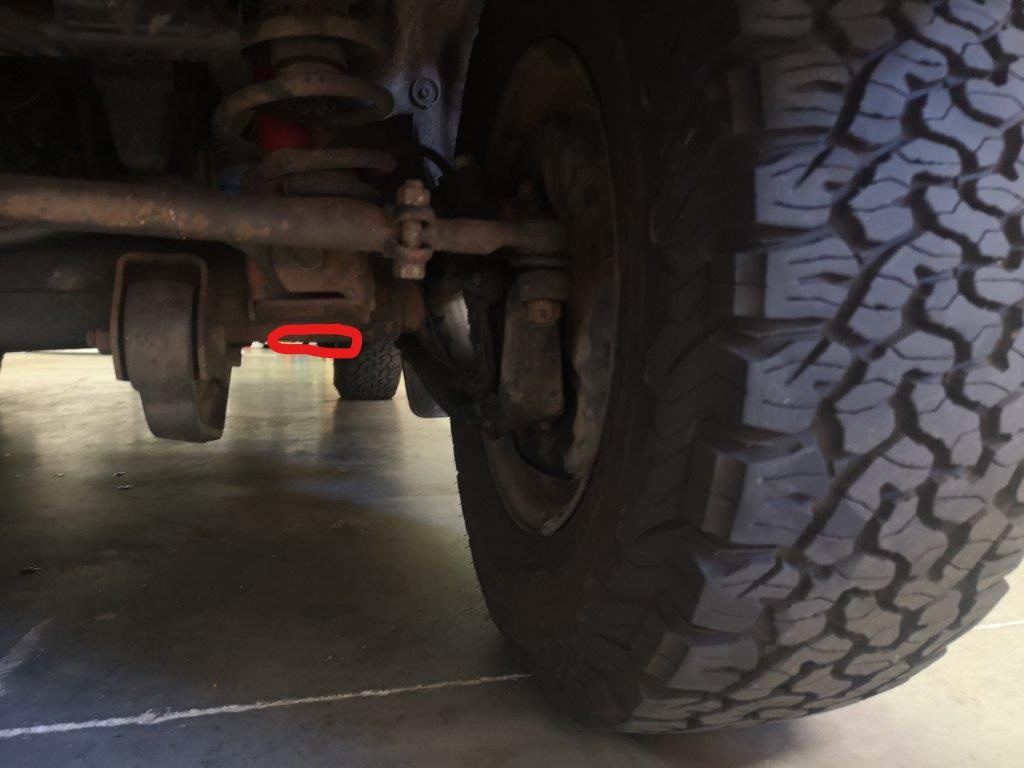
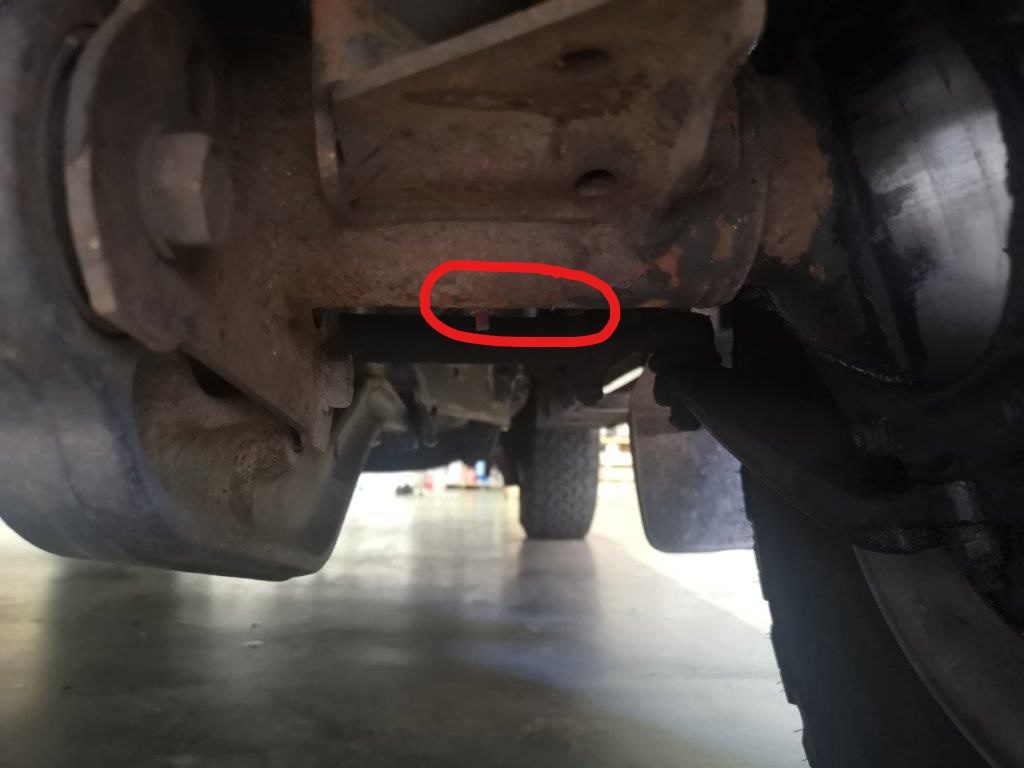
Now you know where it goes, you need to jack up the vehicle. The easiest way is to adjust the bottle jack with your fingers to roughly the right height before you put it under the car, as you put it under get it finger tight first and then you can reach for your extension bars to do the heavy lifting!
Now you know where it goes, you need to jack up the vehicle. The easiest way is to adjust the bottle jack with your fingers to roughly the right height before you put it under the car, as you put it under get it finger tight first and then you can reach for your extension bars to do the heavy lifting!
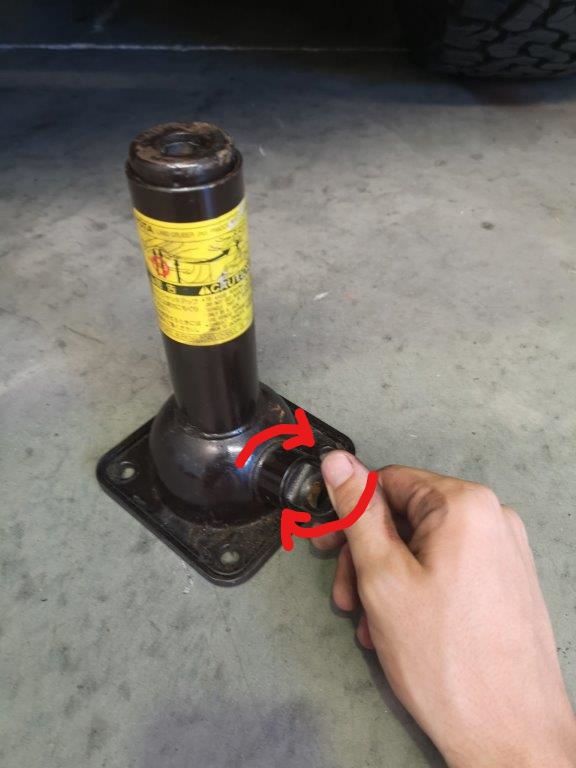
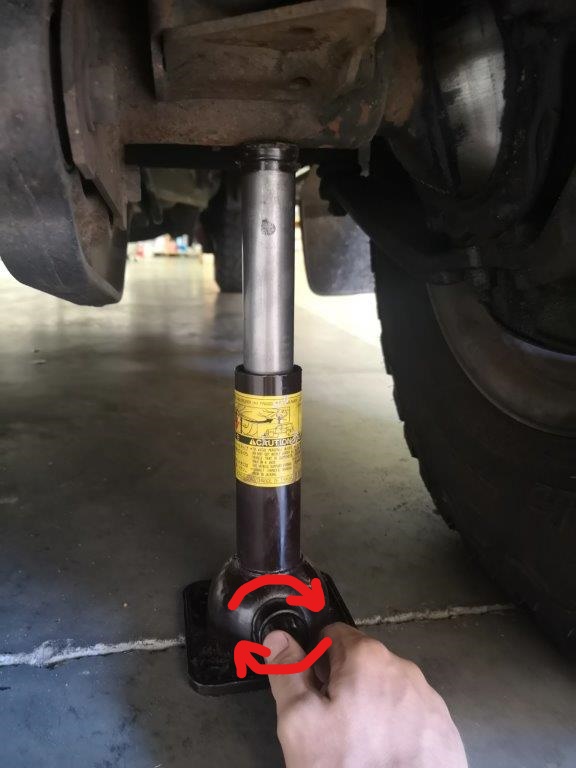
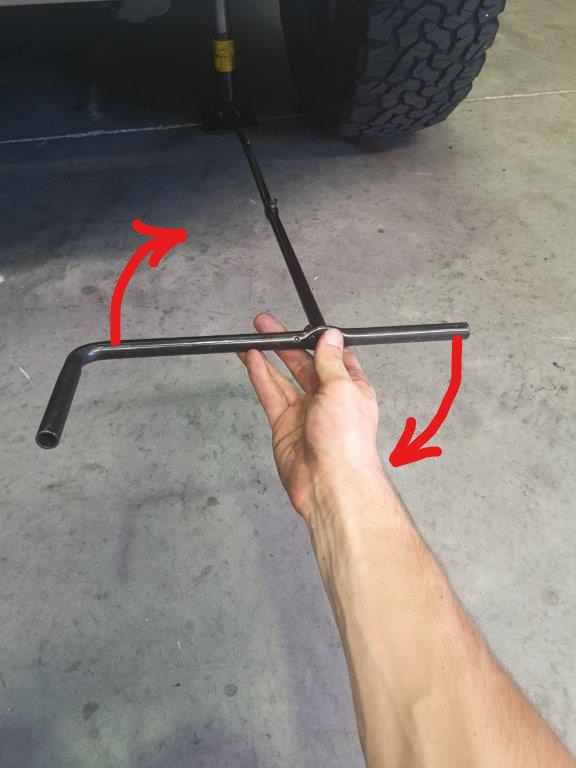
Once the jack is positioned correctly, get the extension bar as shown below and hook it into the bottle jack. To lift the vehicle, turn clockwise (Righty tighty, lefty loosy!)
Once the jack is positioned correctly, get the extension bar as shown below and hook it into the bottle jack. To lift the vehicle, turn clockwise (Righty tighty, lefty loosy!)
Once the flat tyre is off the ground, remove the bolts (that should already be loose) and remove the wheel. At this point we also highly recommend you put the wheel you took off under the car as additional safety (as shown below) until the spare wheel is safely secured.
Once the flat tyre is off the ground, remove the bolts (that should already be loose) and remove the wheel. At this point we also highly recommend you put the wheel you took off under the car as additional safety (as shown below) until the spare wheel is safely secured.

How to Change a Flat Tyre – Step 4 – Lower the Spare
How to Change a Flat Tyre – Step 4 – Lower the Spare
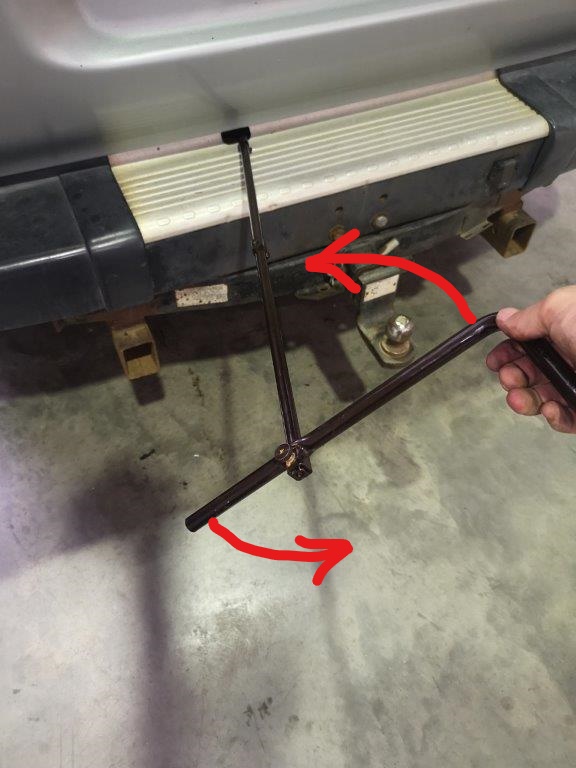
Some of our vehicles have the spare mounted to the back of the vehicle, these are easy to replace and are usually unlocked using the ignition key. Others have the wheel mounted below the car. When the spare wheel is mounted below the car, you use the hook of the extension bar to wind-down the spare wheel for access.
Some of our vehicles have the spare mounted to the back of the vehicle, these are easy to replace and are usually unlocked using the ignition key. Others have the wheel mounted below the car. When the spare wheel is mounted below the car, you use the hook of the extension bar to wind-down the spare wheel for access.
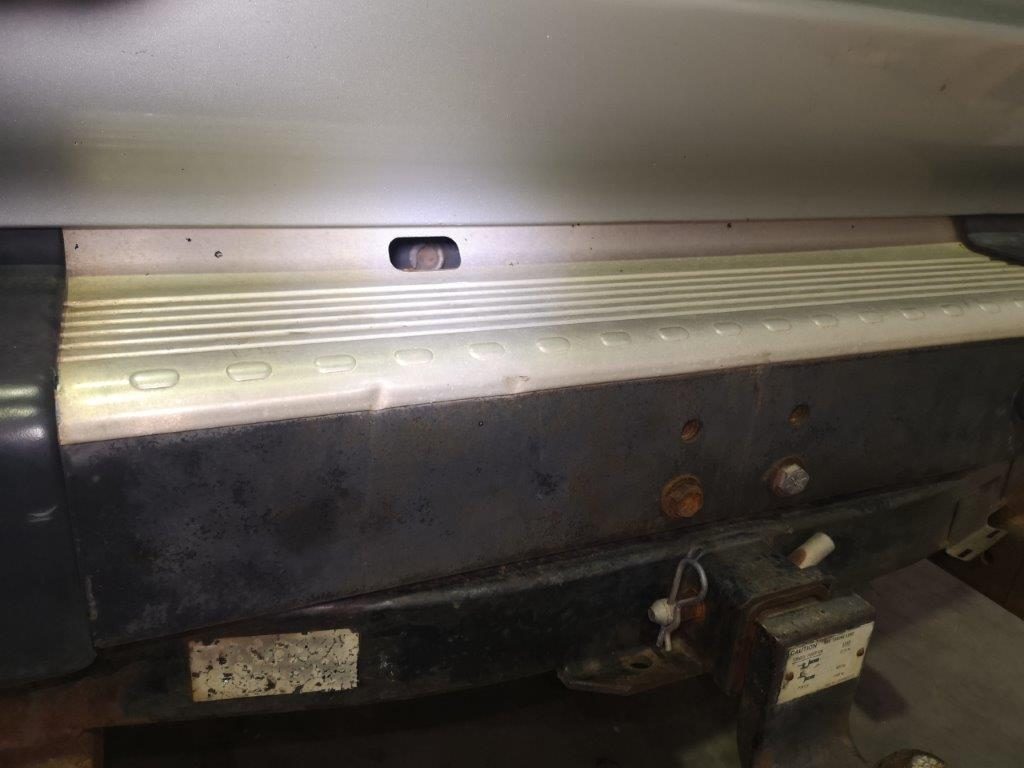
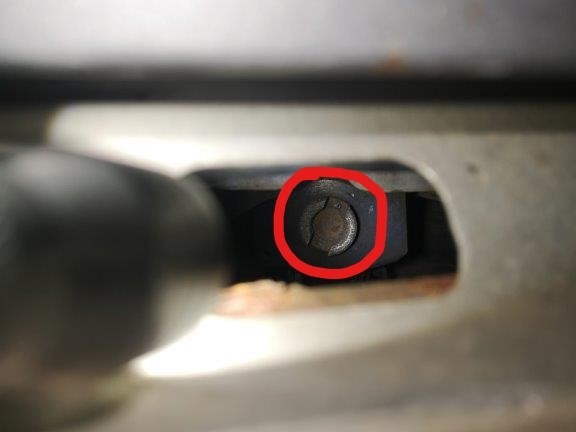
See here the hook end is threaded through the hole, lined up with the mechanism and the wheel can be wound down.
See here the hook end is threaded through the hole, lined up with the mechanism and the wheel can be wound down.
How to Change a Flat Tyre – Step 5 – Replace and Continue Travels
How to Change a Flat Tyre – Step 5 – Replace and Continue Travels
Once the spare is dropped down, replace it with the flat and get the bolts so they are reasonably tight – you are going to tighten them properly when the car is back on the ground. When tightening the bolts, make sure you tighten them in a star, as shown below.
Once the spare is dropped down, replace it with the flat and get the bolts so they are reasonably tight – you are going to tighten them properly when the car is back on the ground. When tightening the bolts, make sure you tighten them in a star, as shown below.
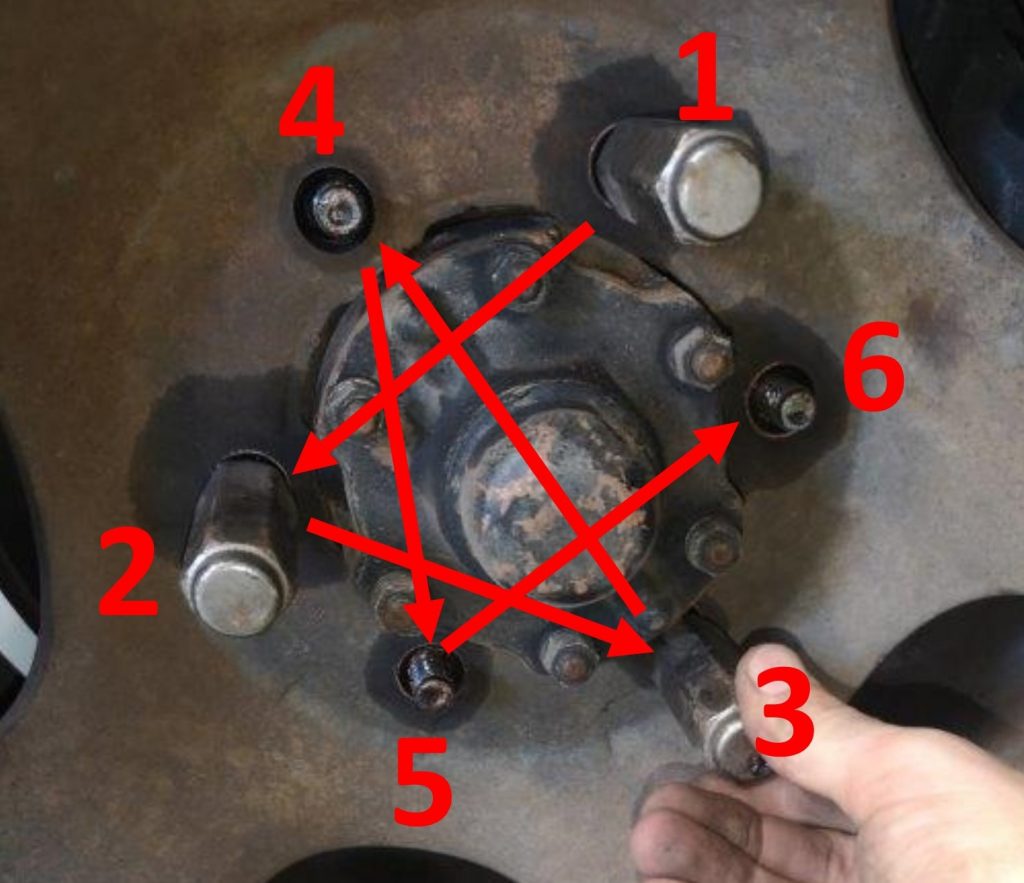
Once you have the bolts back on, lower the car down carefully – make sure that you keep everything clear as you do this. Once it is safely back on the ground, you can tighten the bolts properly – and do not use your feet!! Just firm with your hands using the tyre bar is enough, otherwise the next person who tries to take them off is going to have a tough time!!
Once you have the bolts back on, lower the car down carefully – make sure that you keep everything clear as you do this. Once it is safely back on the ground, you can tighten the bolts properly – and do not use your feet!! Just firm with your hands using the tyre bar is enough, otherwise the next person who tries to take them off is going to have a tough time!!

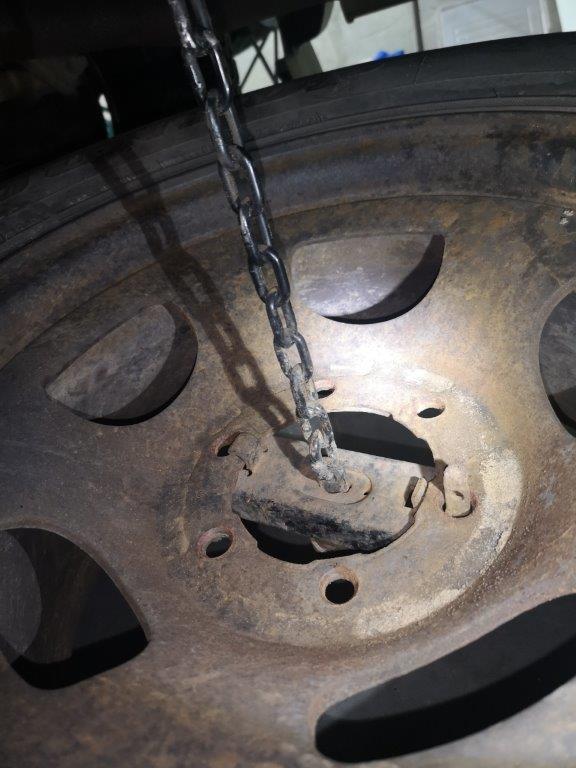
Finally, when putting the flat tyre on the chain, you need to make sure the bracket is correctly fastened. We have included a photo below of how this should look.
Finally, when putting the flat tyre on the chain, you need to make sure the bracket is correctly fastened. We have included a photo below of how this should look.
If you’re unsure of anything we’ve written above, ask a Wongai team member at handover and we will be happy to help!
If you’re unsure of anything we’ve written above, ask a Wongai team member at handover and we will be happy to help!

